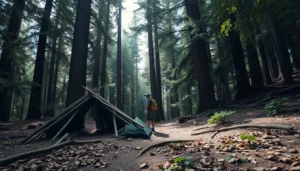
In an era marked by increasing global uncertainties, more people are wondering on how to build a doomsday bunker as a safeguard against potential calamities.
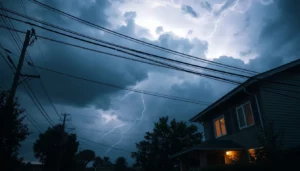
Natural disasters, political instability, and worldwide health crises have become pressing concerns, prompting many to consider the merits of having a secure underground shelter.
Underground shelters have evolved significantly since their Cold War origins.
Once the exclusive domain of government agencies and wealthy elites, these protective sanctuaries are now within reach for many ordinary citizens.
With careful planning, appropriate resources, and a commitment to preparedness, you can construct your own refuge against unforeseen threats.
This guide will walk you through the fundamental aspects of creating a doomsday bunker.
We’ll explore crucial factors such as selecting an optimal location, designing a functional layout, and ensuring a well-stocked supply of essential provisions.
Let’s dive into the world of personal bunkers and empower you with the knowledge to create your own haven of safety in an unpredictable world.
Family Bunker Plans
Understanding the Need for a Doomsday Bunker
Doomsday prepping has gained significant traction in recent years, as an increasing number of people recognize the importance of being prepared for potential catastrophes.
A survey reveals that 61% of Americans believe a major disaster could occur within the next five years, underscoring the growing concern about future uncertainties.
Potential scenarios requiring a bunker
Survival bunkers serve as a practical solution for those seeking to safeguard themselves and their loved ones during tumultuous times.
These underground havens offer protection against a wide array of potential threats, including economic collapses, social upheaval, extreme weather events, and even nuclear conflicts.
The recent COVID-19 pandemic has further emphasized the rapid pace at which global circumstances can shift, reinforcing the value of having a secure retreat.
Benefits of having a personal survival shelter
First and foremost, it provides physical protection from natural disasters, severe weather, and potential threats from the outside world.
But beyond that, a well-thought-out shelter can be designed to serve as a self-contained ecosystem, where you have everything you need to survive comfortably for long periods of time.
Equipped with essentials like food, water, ventilation, and even energy sources, your shelter ensures that you and your loved ones can maintain a level of normalcy during crises.
It allows you to be self-reliant, keeping you safe and secure, while the world outside might be chaotic or dangerous.
The mental comfort that comes with knowing you have a reliable, well-prepared space can significantly reduce stress and anxiety in difficult times.
How to Build a Doomsday Bunker: Step-by-Step Guide
Family Bunker Plans
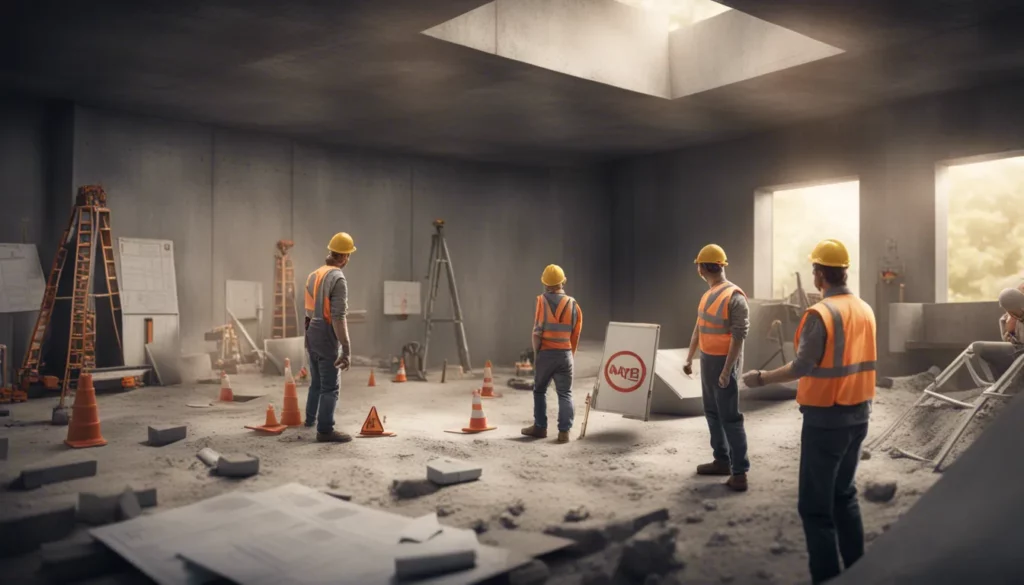
Building a doomsday bunker is a complex and intensive project that requires detailed planning, substantial investment, and technical know-how to ensure it serves its purpose in providing safety and survival.
Below is a brief step-by-step guide to help you create a bunker capable of supporting a family of five, covering the key areas of planning, dimensions, waterproofing, ventilation, power sourcing, and more.
Step #1: Planning and Budgeting
- Purpose: Define the primary purpose of your bunker (e.g., natural disasters, nuclear fallout, long-term isolation).
- Budget: An affordable but functional bunker will cost anywhere from $20,000 to over $200,000, depending on its size and features.
- Location: Choose a secluded and secure location, preferably underground or within a hillside, away from urban areas, with soil stability suitable for construction.
- Permits: Check local building codes and obtain necessary permits before construction.
- Security: Plan for security measures, such as hidden entrances, reinforced doors, and surveillance.
Step #2: Choosing Dimensions
For a family of five, the size of the bunker depends on how long you intend to stay there. However, basic recommendations include:
- Minimum Space: 10 to 12 square feet per person for sleeping areas.
- Total Space: Plan for around 300 to 500 square feet for living, storage, and utilities. For long-term survival, larger is better.
- Height: Ensure the ceiling height is at least 7 to 8 feet to avoid feelings of claustrophobia.
Example Layout:
- Sleeping Area: Separate space for bunk beds or individual beds (around 80-100 sq. ft.)
- Common Area: Dining, sitting, and living (around 100 sq. ft.)
- Bathroom: Simple bathroom setup with composting toilet (30-50 sq. ft.)
- Storage: Designated areas for food, water, and supplies (100-150 sq. ft.)
- Mechanical Room: Space for utilities like power and ventilation systems (50 sq. ft.)
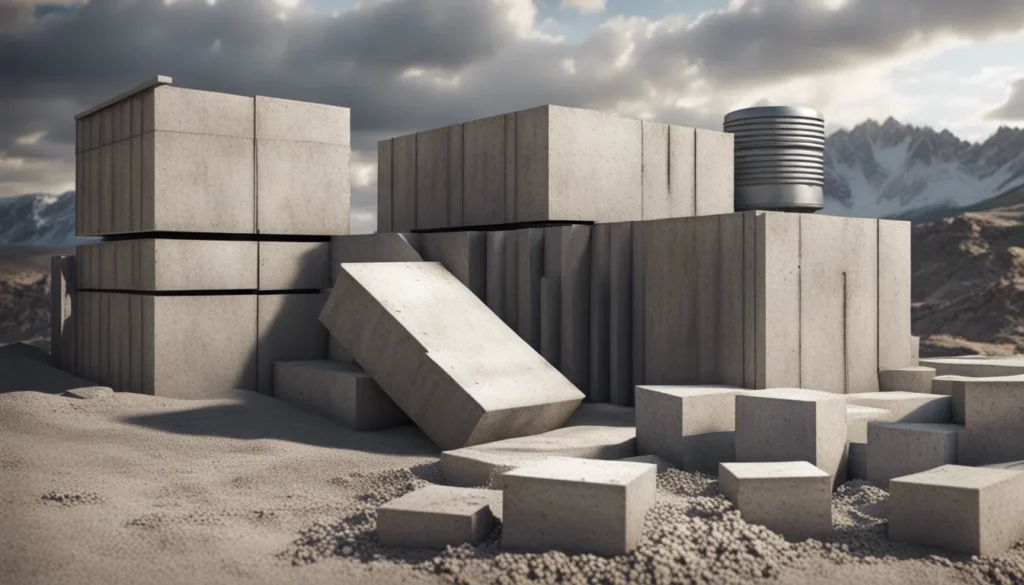
Step #3: Excavation and Foundation
- Excavation: Dig a hole larger than the bunker itself to allow room for structural supports and waterproofing.
- Depth: For adequate protection against radiation, you need to be 10 to 20 feet underground.
- Foundation: Lay a concrete slab foundation at least 8 inches thick to support the structure.
- Reinforcement: Use steel rebar to reinforce the concrete walls and ceiling, making the structure resistant to earthquakes, blasts, or other impacts.
Step #4: Walls and Ceiling
- Material: Use reinforced concrete or steel to construct the bunker’s walls and ceiling. The concrete walls should be at least 12 inches thick, and ceilings at least 18 inches thick.
- Reinforcement: For extra strength, embed steel beams or use a steel frame within the walls.
- Blast Doors: Install a reinforced, airtight blast door that is resistant to pressure waves, fire, and unauthorized access.
Step #5: Waterproofing
- External Waterproof Membrane: Before burying the structure, apply a waterproof membrane around the outside of the walls. Bituminous membranes or rubberized asphalt are effective.
- Drainage System: Install a French drain around the perimeter to channel water away from the bunker.
- Internal Waterproofing: Use water-resistant paint or epoxy on interior walls and floors to prevent moisture seepage.
- Sump Pump: Install a sump pump system to remove any water that manages to enter the bunker, especially if you’re in an area with a high water table.

Protect your family and property in uncertain times!
Before we continue, let me introduce you to Guerilla Home Defense — the ultimate survival guide for navigating the uncertain times ahead.
Covering all three stages of the impending crisis in America, this guide equips you with the tools to protect your home from the surge in crimes like break-ins and attacks, handle the chaos of riots and looting, and even prepare for the potential of civil war.
If you’re serious about staying safe when disaster strikes, Guerilla Home Defense is a must-have resource.
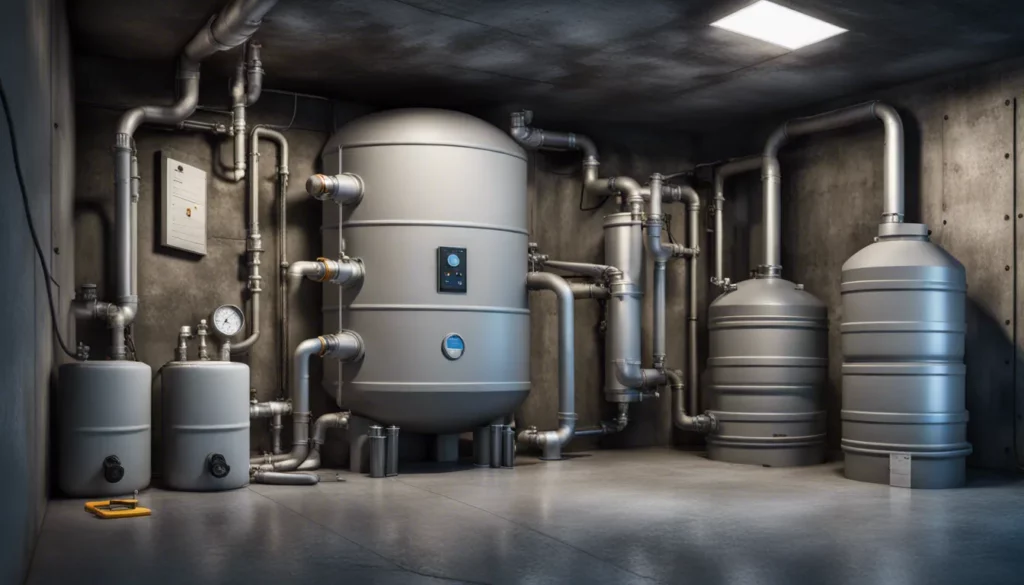
Step #6: Ventilation System
A proper air filtration and ventilation system is crucial to prevent suffocation, regulate temperature, and protect against airborne toxins:
- Air Intake and Exhaust Pipes: Install two separate pipes — one for fresh air intake and one for exhaust. These should be fitted with blast valves to prevent shockwaves from damaging the system.
- Air Filtration Unit: Install a HEPA filter system to purify the incoming air, and add NBC (nuclear, biological, chemical) filters to protect against airborne toxins and radiation.
- Manual Ventilation: Consider a hand-crank ventilation system in case of power failure, allowing you to manually circulate air.
Step #7: Power Source
- Primary Power: Solar power is the most reliable long-term energy solution. Install solar panels above ground and run cables to an underground battery storage system.
- Backup Generator: Diesel or propane-powered generators provide backup power, but you’ll need sufficient fuel storage (minimum 500 gallons for extended use).
- Battery Bank: Use deep-cycle batteries to store solar energy. A 10kWh to 20kWh battery bank is ideal for a family of five for basic needs.
- Inverter System: Use a high-quality inverter to convert DC power from batteries into AC power for household appliances.

Cut Your Power Bills By 65%!
The simplest, easiest-to-use A to Z blueprint that anyone can follow to make their own cheap green electricity.
Step #8: Water Supply
- Well: If possible, dig a deep well and install a submersible pump to provide fresh water. Ensure you have manual pump options if the power fails.
- Water Storage: Store at least 1 gallon of water per person per day for drinking, plus additional water for hygiene and cleaning. For a family of five, aim to store 500-1,000 gallons.
- Water Filtration: Include a water filtration system with ceramic or UV filters to ensure clean water from any source.
Create Your Own Water Supply!
EXCLUSIVE step-by-step guide showing you EXACTLY how to create your own “home oasis” TODAY and how to survive any tough century long drought!
Step #9: Sanitation
- Toilet System: Composting toilets are ideal as they don’t require plumbing. Install two composting units to rotate use and manage waste effectively.
- Greywater System: Channel wastewater from sinks and showers into a greywater system that filters and recycles it for non-potable uses like cleaning.
- Septic System: If you want a more conventional approach, install a small underground septic tank.
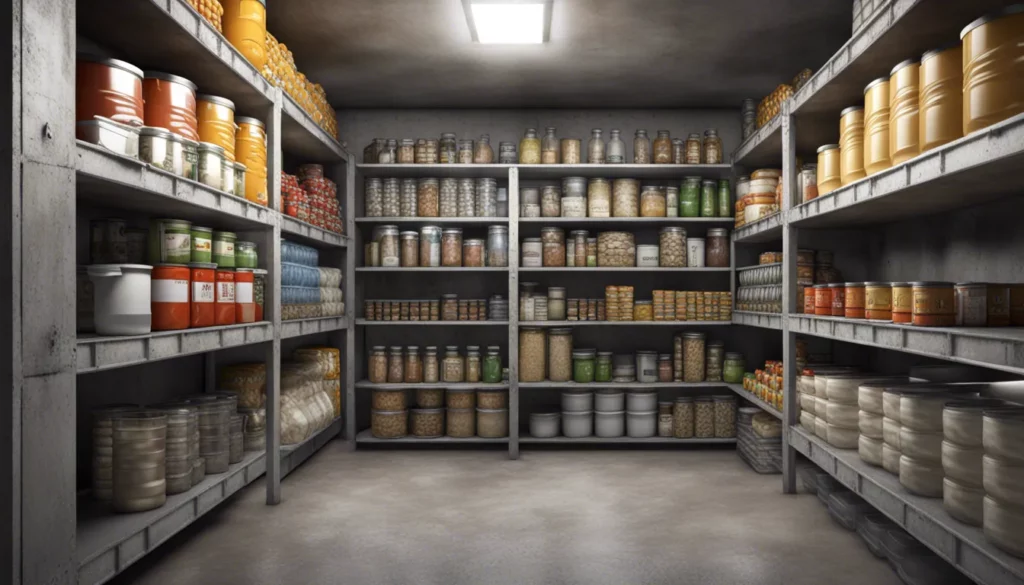
Step #10: Food Storage
ReadyWise Emergency Food Supply
With an impressive 25-year shelf life, it guarantees a reliable source of sustenance when it matters most.
This package contains 12 buckets packed with more than 120 servings of flavorful, wholesome meals made with real ingredients.
Whether you're enjoying hearty oatmeal or delicious pasta dishes, you'll never have to sacrifice taste, even during emergencies.
- Long-Term Storage: Designate a storage room for shelf-stable foods like rice, beans, canned goods, freeze-dried meals, and MREs. Rotate supplies regularly.
- Climate Control: Ensure this storage room is cool and dry to prevent spoilage. A temperature of 50-60°F (10-15°C) is ideal.
- Hydroponics: Consider setting up a small hydroponics system to grow fresh vegetables inside the bunker.
Step #11: Lighting and Temperature Control
- Lighting: Use energy-efficient LED lighting, ideally powered by your solar system. Keep flashlights, lanterns, and rechargeable battery packs as backup.
- Temperature Control: Install an HVAC unit or use a geothermal system for efficient heating and cooling. Passive temperature control through insulation can also help maintain a steady environment.
Step #12: Communication Systems
- Radio System: Install a shortwave radio to stay informed about outside events. Include two-way radios for communication with others if necessary.
- Faraday Cage: Store sensitive electronics like phones, radios, and other communication devices in a Faraday Cage to protect them from EMP (Electromagnetic Pulse) attacks.
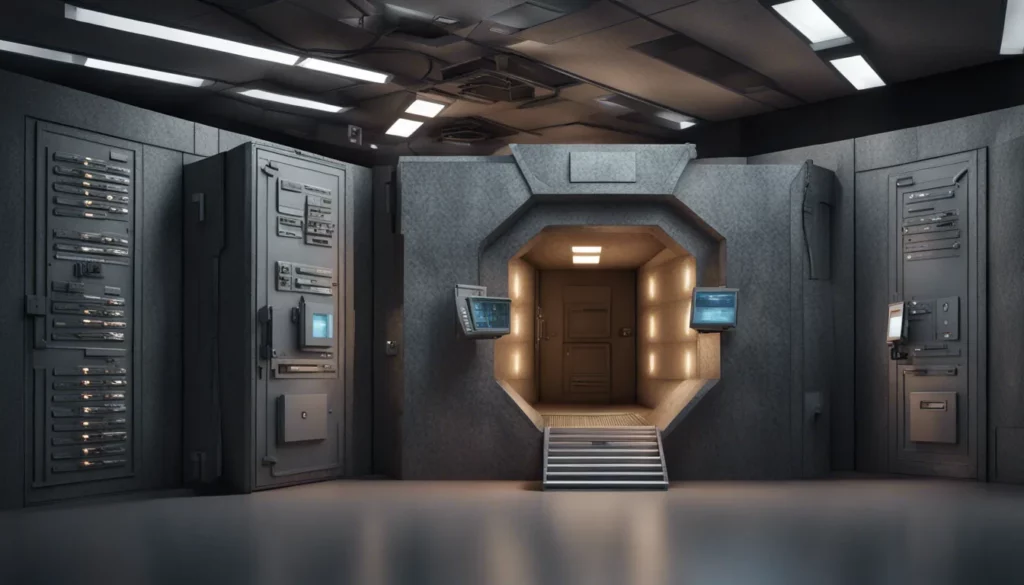
Step #13: Security and Defense
- Perimeter Security: Install surveillance cameras, motion detectors, and trip alarms around the bunker’s entrance and above-ground installations.
- Reinforced Entrance: Make sure your bunker has hidden or disguised entrances to avoid detection.
- Weapons Storage: If allowed by law and necessary for your situation, create a secure room for weapons, ammunition, and self-defense tools.
SimpliSafe Home Security System
Arlo Home Security System
Wyze Home Security System
Step #14: Furnishing and Comfort
- Beds and Furniture: Opt for space-saving furniture like bunk beds and foldable tables. Use durable, multi-functional items to conserve space.
- Entertainment and Mental Health: Include books, board games, and entertainment systems to prevent boredom and maintain morale during long stays underground.
Step #15: Testing and Maintenance
- Testing: Before sealing the bunker, test all systems (water, power, ventilation, filtration, communication).
- Regular Maintenance: Regularly inspect and maintain your bunker systems to ensure they function when needed. Keep spare parts for key equipment like filters, solar panels, and pumps.
Next, we are going to discuss in more details some of the items from the guide above.
Planning and Designing Your Doomsday Bunker
Family Bunker Plans
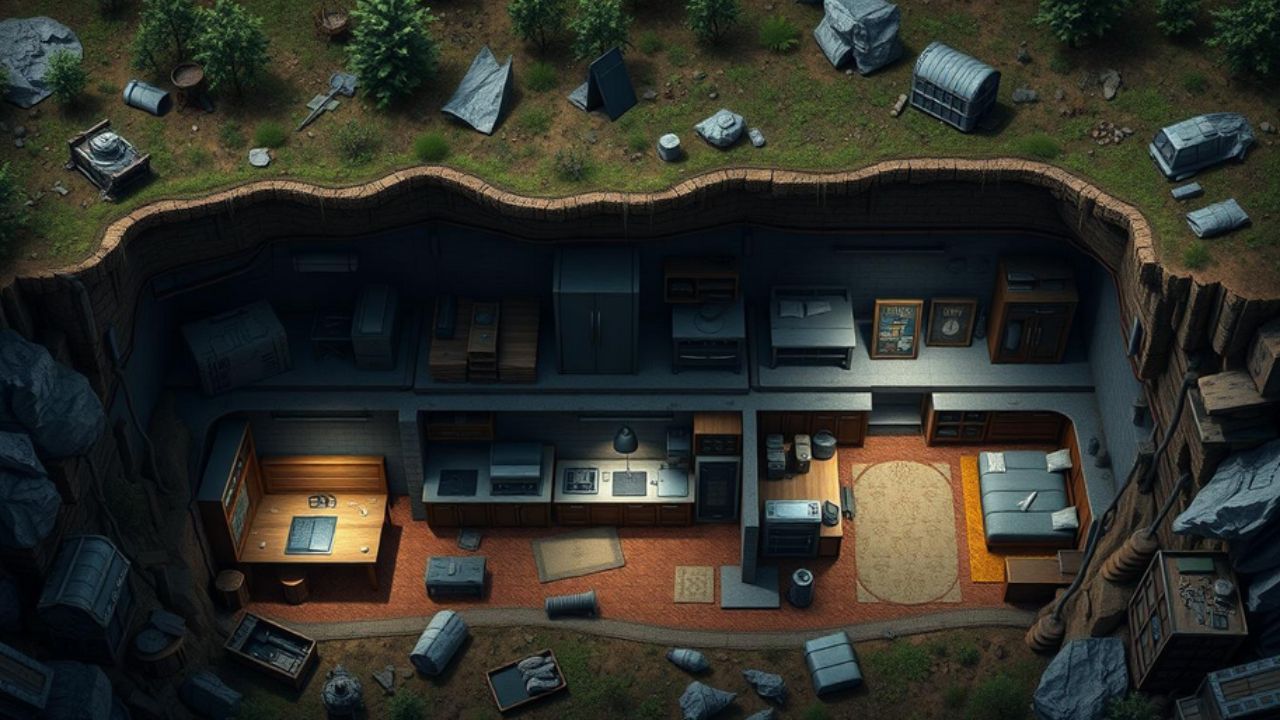
Creating a good doomsday shelter layout is key for survival. Your bunker should be both functional and comfortable. It needs areas for sleeping, cooking, bathroom, and common spaces.
Ideally speaking, you should be planning for at least 100 square feet per person for your bunker design to avoid feeling trapped. This space is enough for living and storing important supplies.
For instance, Survival Condo in Kansas has spaces from 900 to 3,600 square feet for different family sizes.
Some bunkers, like Vivos Europa One in Germany, are very large and luxurious. But, you don’t need to spend a lot to make your bunker practical and cozy.
Cost Considerations and Budgeting
How much does a doomsday bunker cost?
Well, Building a doomsday bunker requires not only a strategic approach to design and construction but also careful financial planning.
The price of a doomsday bunker can vary significantly, from basic shelters costing around $20,000 to luxury bunkers that run into the millions.
Your overall budget will depend on several factors, including the size of the bunker, the depth at which it’s built, and the specific features you want to include, such as air filtration, water systems, and power sources.
Estimating Construction Costs
For a small bunker, about 200 square feet and 10 feet deep, you can expect to spend around $20,000.
On the other hand, a larger, more complex bunker that exceeds 1,000 square feet and goes 20 feet or deeper could easily surpass $150,000.
A major portion of the expense comes from excavation, which alone could cost upwards of $5,000 depending on your land and the depth you need.
If you’re considering a pre-fabricated option, a doomsday bunker price typically starts at around $30,000 for basic models, while top-of-the-line, luxury options can skyrocket to over $9.6 million. These high-end bunkers often come with advanced technology, luxury living spaces, and extensive security features.
Ongoing Maintenance Expenses
The initial construction or purchase of a bunker is only part of the cost.
You’ll need to account for ongoing maintenance, which is essential to keeping your shelter functional over the years.
For instance, your air filtration system will require regular checkups and possible replacements, and your water purification system may need periodic updates or repairs.
You’ll also need to rotate stored food to prevent spoilage and ensure that supplies are always fresh.
If you’re part of a bunker community, there could be annual fees for upkeep and shared resources, adding another layer to your budgeting.
It’s also important to plan for potential repairs, especially related to moisture control, as mold and other moisture-related damage can quickly become a costly issue if not properly managed.
Is it Worth It?
For many, the peace of mind that comes with knowing their family is protected from disasters — whether natural events like tornadoes or man-made threats such as nuclear fallout — makes the cost worthwhile.
In uncertain times, having a well-prepared bunker can provide security and a sense of control.
When evaluating the costs, consider the value of safeguarding your family and the potential risks you want to mitigate.
Choosing the Right Location for Your Doomsday Bunker
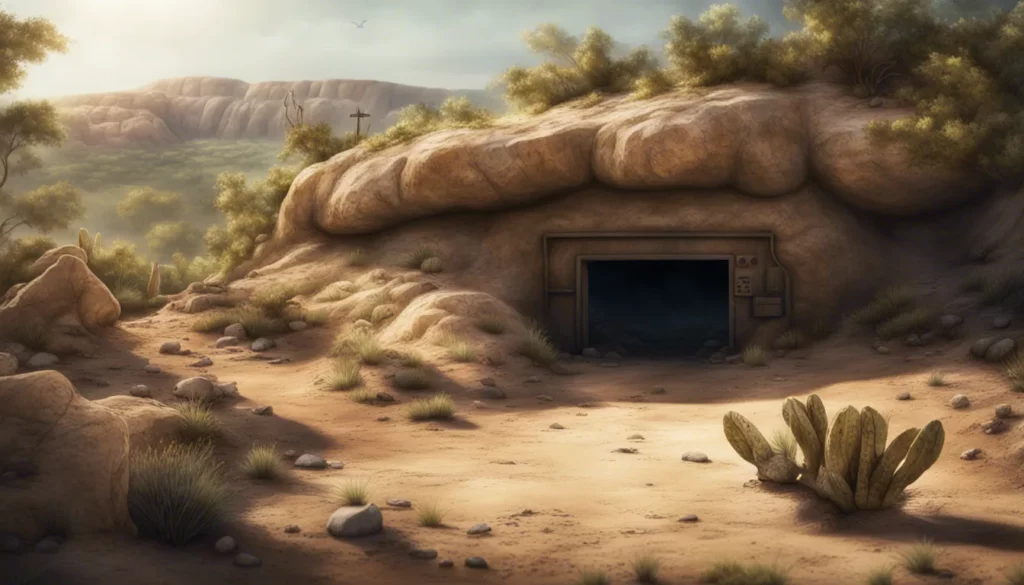
Finding the right location is crucial for your doomsday bunker for both safety and long-term usability.
You need to consider a variety of factors to ensure your shelter can handle potential threats and provide lasting protection.
Start by choosing a spot that’s at least 50 feet away from buildings, trees, and other structures. This distance reduces the risk of damage from fires, falling debris, or other hazards during a disaster.
A flat, level area is ideal for underground shelter construction because it provides a stable foundation and simplifies the building process.
One of the most critical steps in this process is checking the water table in the area.
Avoid locations with shallow water tables (around 3 feet or less), as these are prone to flooding, which can jeopardize the integrity of your shelter.
Additionally, look for spots that offer natural camouflage but are still accessible. You want your bunker to blend in with the environment while ensuring you can reach it quickly and easily when necessary.
The type of soil you’re building on also matters.
Certain soils, like “Orange Ruffie,” require special attention because they need moisture to maintain their structure. Understanding the soil conditions helps you make necessary adjustments to strengthen your shelter, such as reinforcing the walls or installing proper drainage systems.
Ultimately, the best location is one that balances safety, ease of access, and discretion. Don’t rush this step; take your time to evaluate different sites and consult with experts to ensure you’ve made the best possible decision for your shelter’s construction.
Legal Considerations and Permits
Building your own doomsday bunker involves more than just digging a hole and starting construction.
You need to follow specific legal steps to ensure your project complies with local regulations and avoids unnecessary complications.
Navigating these requirements is an essential part of emergency preparedness, as failing to do so can lead to fines or even the forced removal of your shelter.
Local Zoning Laws and Regulations
Before breaking ground, check your local zoning laws. These regulations dictate what types of structures you can build on your property.
Some areas may have restrictions on underground shelters, while others might have specific rules for emergency preparedness structures.
Zoning laws can also impact how much food or water you can store, or whether you’re allowed to collect rainwater for long-term survival. Understanding these guidelines ahead of time will save you from potential legal issues later on.
Obtaining Necessary Building Permits
Once you’ve reviewed zoning laws, the next step is obtaining the necessary building permits.
These permits ensure that your bunker meets local building codes and safety standards.
You’ll likely need to submit detailed blueprints outlining the size, materials, and safety features of your shelter.
Keep in mind that FEMA recommends allowing 5-10 square feet per person in an emergency shelter, so be sure your plans account for that.
Environmental Impact Assessments
Depending on where you plan to build, you might also need to complete an environmental impact assessment.
This process evaluates how your bunker could affect the surrounding environment, especially if you’re building in a sensitive area like wetlands or forests.
A thorough assessment can prevent legal setbacks and help you build in a way that minimizes harm to nature.
Family Bunker Plans
Essential Features of a Doomsday Bunker
A well-equipped survival bunker is both a protective structure and a self-sustaining environment that ensures your safety, health, and comfort in any emergency. Focusing on essential features will help you remain secure and well-prepared for extended periods of time in your doomsday bunker.
Air Filtration and Ventilation
One of the most important features in any survival bunker is proper air filtration and ventilation. Without fresh, clean air, survival becomes impossible.
A good ventilation system not only circulates air but also filters out harmful particles such as dust, smoke, or contaminants from external threats.
Systems like the Abestorm air filtration are specifically designed to remove biological and chemical threats.
Ensuring that your filtration system is well-maintained is crucial for keeping the air inside your bunker breathable and safe, especially during prolonged stays.
Abestorm Air Scrubbers with 4 Stage Filtration System
Water Storage and Purification
In any disaster planning scenario, securing a clean water supply is essential for survival. It’s recommended to store at least one gallon of water per person per day to cover drinking, cooking, and hygiene needs.
However, just storing water isn’t enough, you’ll need a reliable purification system in place to keep the water safe.
Installing water filters and chemical treatment options will help remove harmful contaminants and prevent waterborne diseases, which is critical if your stay in the bunker extends for weeks or months.
Create Your Own Water Supply!
EXCLUSIVE step-by-step guide showing you EXACTLY how to create your own “home oasis” TODAY and how to survive any tough century long drought!
Food Storage and Preparation
A well-stocked food supply is another key aspect of a survival bunker.
Consider building a food storage area with shelves for canned goods, freeze-dried meals, and other long-lasting items.
Projects like the Survival Condo ensure residents have enough food to last for years, so your storage plan should similarly prioritize foods that can be preserved over time.
Don’t forget to include a designated kitchen space with basic cooking appliances and tools to prepare meals efficiently. This setup will keep you nourished and maintain a sense of routine during extended emergencies.

Discover how to build a 100+ days stockpile from scratch, in under 10 days!
This is the ultimate guide to building a bulletproof stockpile that takes you from being uncertain about your preps to being 100% confident that your family will comfortably survive the first 100 days & beyond of any disaster.
Power Systems
Reliable power is necessary to keep essential systems in your bunker operational.
Solar panels, batteries, and generators are popular choices for off-grid power solutions.
Companies like EcoFlow offer solar and battery options tailored for long-term energy needs.
Make sure to have backup systems in place, such as additional batteries or fuel-powered generators, to guarantee continuous electricity if your primary power source fails.
Having a stable power supply ensures that lighting, heating, and crucial equipment like air filtration and communication systems remain functional throughout your stay.
Cut Your Power Bills By 65%!
The simplest, easiest-to-use A to Z blueprint that anyone can follow to make their own cheap green electricity.
Materials and Construction Techniques
Building a bunker requires strategic material selection and construction techniques to ensure long-term safety and functionality.
A well-planned bunker design accounts for durability, waterproofing, insulation, and even protection from radiation, making material choice a critical factor.
Material Selection for Bunker Construction
The backbone of any solid bunker is the material used for its structure.
Reinforced concrete is often the top choice due to its incredible strength and ability to withstand extreme pressures. It’s durable enough to protect against various threats, from natural disasters to man-made emergencies.
However, if you’re working with a more limited budget, there are alternative materials that can still offer protection.
Exploring Alternatives: Earthbags and Shipping Containers
For those looking to cut costs, materials like earthbags and shipping containers can be viable options.
Earthbags, filled with tightly packed soil or sand, offer a sturdy and budget-friendly solution.
Shipping containers, particularly 20-foot or 40-foot models, can also serve as the base structure for a bunker.
However, it’s important to remember that a shipping container alone is not enough. It needs to be reinforced to handle the weight of the soil placed on top and around it.
Without reinforcement, containers can collapse under pressure, so structural modifications are essential.
Waterproofing and Insulation
Keeping your bunker dry and well-insulated is critical for both comfort and the longevity of the structure.
Waterproofing materials, such as silo plastic or heavy-duty membranes, create a moisture barrier to prevent leaks or dampness from seeping in.
Ensuring that your bunker stays dry also reduces the risk of mold or structural damage.
Insulation is another key factor in maintaining a comfortable living environment.
Proper insulation will help regulate the temperature inside your bunker, reducing the need for excessive heating or cooling systems and keeping energy costs manageable.
Insulating your bunker walls and ceiling with quality materials helps retain heat during the winter and cool air during the summer, making the bunker livable for extended periods.
Radiation Shielding
The Ultimate Guide to Preparing Your Home for a Sudden EMP Attack on the Grid!
In the event of a nuclear emergency, having adequate radiation shielding is essential. Fortunately, soil is a natural and effective barrier against gamma radiation.
Covering your bunker with at least 36 inches of soil can block more than 95% of gamma rays, offering significant protection from radiation. Ensuring this level of shielding should be part of the initial bunker design, especially if nuclear threats are a concern.
Engineering Expertise
Involving structural and geotechnical engineers ensures that your bunker is built safely and to code.
These experts help assess the soil type, advise on appropriate construction materials, and guide the design to ensure the structure can withstand both the pressure of the earth above and the specific threats you are planning for.
Security Measures for Your Bunker
A well-protected bunker not only shelters you from natural disasters or societal collapse but also deters unwanted visitors and external threats.
To ensure your bunker remains a safe haven, there are several important security measures you should consider.
Concealing the Entrance
The first step to keeping your bunker secure is ensuring that it stays hidden. A concealed entrance is crucial during times of crisis when desperate people might seek out resources.
You can use natural camouflage like dense foliage or rock formations to blend your entrance into the environment.
Another option is building a small shed or outbuilding to hide the entry point, making it look like just another storage space instead of the gateway to your underground shelter.
Reinforcing the Structure
Building strong physical defenses into your bunker is key to keeping intruders at bay.
Fortified walls made from reinforced concrete or steel provide added security, making it difficult for anyone to break through.
Similarly, installing an armored door at the entrance ensures a high level of protection, preventing unauthorized access.
It’s also wise to integrate protection against electromagnetic pulses (EMPs) into your design to shield electronic devices from being fried during a nuclear or solar event, preserving your communication and power systems.
Monitoring and Communication
SimpliSafe Home Security System
Arlo Home Security System
Wyze Home Security System
Install cameras or motion sensors around the perimeter to keep an eye on your surroundings without needing to leave the bunker. This setup allows you to monitor any potential threats from a distance and remain aware of what’s happening above ground.
In addition to surveillance, having secure communication channels is vital.
Satellite phones, which can work independently of damaged communication networks, are a good investment for staying connected with the outside world.
Defensive Measures
Beyond passive security, it’s important to consider defensive strategies in the event of a direct threat.
Storing firearms in a secure, locked safe ensures you have access to self-defense tools if needed, but keeps them safely out of reach when not in use.
Designate areas within your bunker for safe storage of weapons and ammunition, and ensure proper training for anyone who may need to use them.
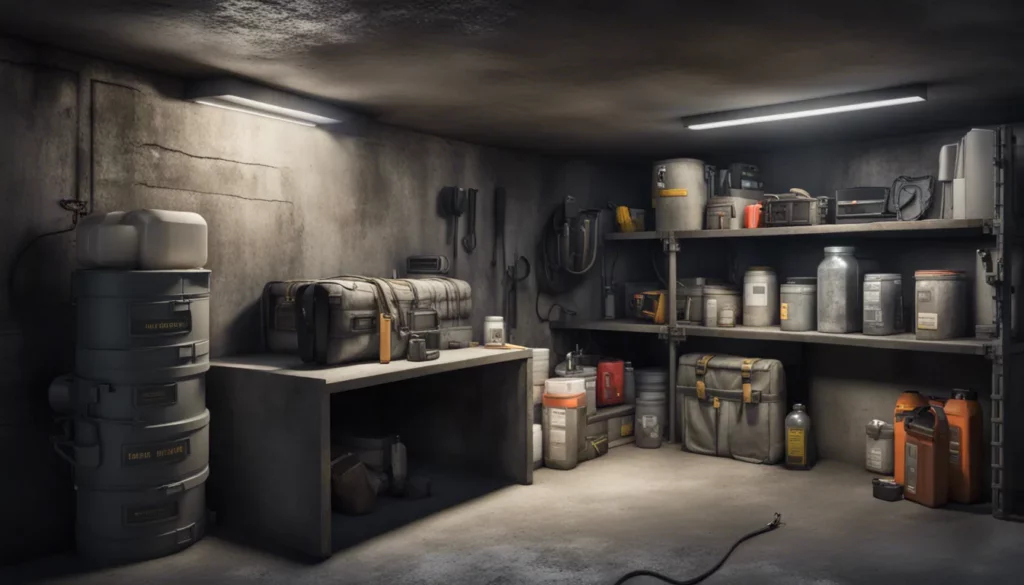
Stocking Your Bunker with Supplies
Discover how to build a 100+ days stockpile from scratch, in under 10 days!
This is the ultimate guide to building a bulletproof stockpile that takes you from being uncertain about your preps to being 100% confident that your family will comfortably survive the first 100 days & beyond of any disaster.
Stocking your bunker with the right supplies is a critical step in doomsday prepping.
Ensuring you have adequate resources for food, water, medical care, and communication will make the difference between short-term survival and long-term comfort during emergencies.
Long-term Food Storage Solutions
ReadyWise Emergency Food Supply
With an impressive 25-year shelf life, it guarantees a reliable source of sustenance when it matters most.
This package contains 12 buckets packed with more than 120 servings of flavorful, wholesome meals made with real ingredients.
Whether you're enjoying hearty oatmeal or delicious pasta dishes, you'll never have to sacrifice taste, even during emergencies.
Non-perishable items like canned goods, freeze-dried meals, and dried beans should form the foundation of your emergency food supply.
Proper storage is key as these items can last for years if kept in cool, dry conditions, ensuring you always have access to nourishment.
However, it’s essential to diversify your food options to include a balance of proteins, carbohydrates, and essential vitamins. Consider adding meal replacement shakes or vitamin supplements to ensure you meet nutritional needs over time.
Water is equally important.
While FEMA recommends storing one gallon of water per person per day, don’t overlook the need for water purification systems.
Filters and purifying tablets will be crucial for extending your water supply, particularly in long-term survival situations.
A sustainable water solution means you’re less dependent on stored reserves and can make use of collected rainwater or groundwater safely.
Medical Supplies and Equipment
Surviveware Comprehensive Premium Survival First Aid
No doomsday prepping plan is complete without a well-stocked medical kit.
At a minimum, include standard first aid essentials like bandages, antiseptics, pain relievers, and sterile gauze. However, it’s also wise to consider more advanced medical supplies based on your family’s needs.
If anyone in your household requires prescription medications, stockpile an adequate supply, keeping an eye on expiration dates to ensure they remain effective.
Other important items to consider are splints, burn care supplies, and over-the-counter medications for allergies or digestive issues.
If possible, take a first aid or basic medical training course so you can confidently handle medical emergencies should professional help be unavailable.
Communication Devices and Emergency Radios
Protect your family and property in uncertain times!
Before we continue, let me introduce you to Guerilla Home Defense — the ultimate survival guide for navigating the uncertain times ahead.
Covering all three stages of the impending crisis in America, this guide equips you with the tools to protect your home from the surge in crimes like break-ins and attacks, handle the chaos of riots and looting, and even prepare for the potential of civil war.
If you’re serious about staying safe when disaster strikes, Guerilla Home Defense is a must-have resource.
To ensure you can receive updates, stock your bunker with battery-powered or hand-crank emergency radios, along with plenty of backup batteries. These radios allow you to receive important news and weather alerts, even if the power grid is down.
Satellite phones or ham radios are also smart investments for two-way communication in case cell phone networks fail. These tools can help you connect with the outside world and coordinate with others for assistance.
To round out your communications setup, pack chargers for your devices and solar-powered chargers to ensure continuous functionality.
Maintaining and Updating Your Doomsday Bunker
Keeping your shelter in top shape is key.
Check all systems often, like air filters, water purifiers, and power sources. This makes sure they work right when you need them.
Don’t forget to swap out food and check expiration dates. This helps avoid spoiled food.
It’s also important to update your shelter for new threats. Test your communication gear and update it when needed. New tech can make things better or add new features.
Adding tactical defense can cost a lot, about a million dollars but it adds extra security.
Also, do drills to make sure everyone knows how to use the bunker. This is crucial in an emergency.
Make sure your shelter has the latest safety features. Some bunkers now have flame-throwers and gassing systems. These might seem extreme, but they show how serious people are about safety.
Regular upkeep and updates will ensure your bunker is always ready.
Conclusion
Building a doomsday bunker is a big task. It needs careful planning and a strong commitment to being ready for disaster.
Every little detail, from air filters to food storage, is important for a safe place. While the need for a bunker might seem unlikely, many find comfort in knowing they’re prepared.
As you start your bunker project, think about what you need and how much you can spend.
While it’s a big job, being prepared can give you peace of mind in a world full of unknowns.